And the epic quest draws to a close!
As the months rolled on, completing my print started becoming more of a reality instead of a far off distant wish.

Carving carving and more carving. When I started printmaking I remember hating carving because it hurt my hands and I didn't really know what the image would look like when it was printed. Now I really like carving, it comes with experience but its really relaxing!


And then... TADA!! I inked up the whole image to make sure everything looked the way I wanted.

And with that, it was finished!! Carving: check. Next step, printing.

So taking advantage of my day off from school because of Presidents Day, I made it my printing day.


I had to figure out how to print this large print without a press because, obviously, of its size. I thought about creating a steam roller event but because I carve with Sintra which is softer then plywood I figured the pressure from the steam roller would crush my image. So I had to come up with another way. My solution: a sod roller I rented from Home Depot for $16 for 24 hours.
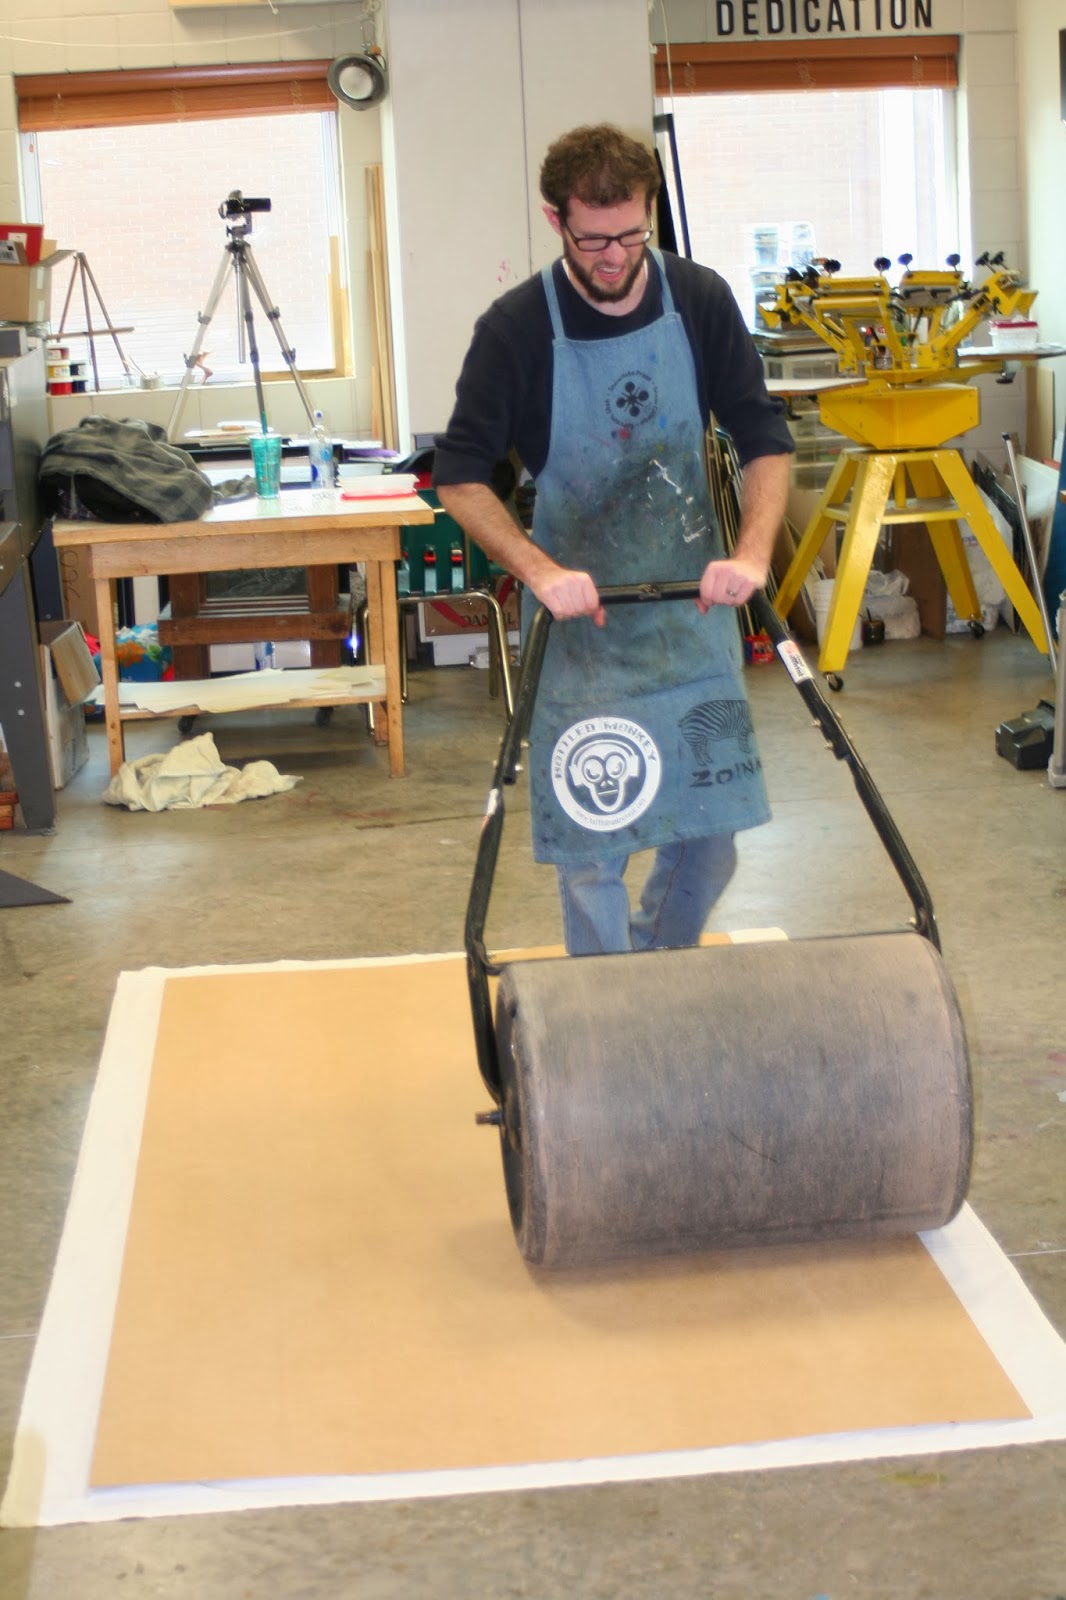
This method worked pretty good. I filled the drum up with water which made it really heavy and then I just walked it back and forth. I purchased a thin sheet of Masonite so that the small scratches wouldn't damage my print.

And the moment of truth!...

Nope. Too light.

I think the big issue was the type of ink we were using. For this first print I was using tubed ink which works really great when you're running a print through a press, yet not so well for this process.

Try again. We switched inks with ink we had in a can which already seemed to be better.

Round 2. I decided that it would be much cheaper to print of fabric and bed sheets then buying lots of paper so most of the prints we made were on fabric. but I did get paper so that I would have some of paper.

The challenge with fabric is the wrinkles and making sure it lays down flat.

With 2 people holding the top down and making sure it doesn't move, we had a few other people smoothing the fabric down


Rolling and rolling....

and then....

Yes!! Success! The different ink really helped the image.

The challenge of an 8 foot print is finding space to let the prints dry after printing. We ended up stringing them up to the rafters and holding them with clothes pins. That was an added blessing because then I could stand back and sigh with relief that it was done!

Hahaha but don't jump the gun too soon, it is far from being done!! That day I ended up printing 11 or 12 in total. I printed 5 on fabric for myself and I created an edition of 3 on Stonehenge paper. Then I printed 3 Printers Proofs for those people who were helping me. It took us all day; we stared printing around 1-130pm and got done at 7, so almost 6 hours of printing. By the end of it we were all tired of being on our feet and felt like we had benched pressed 1000 lbs. Worth it? Most definitely!

Would I do this again? I had a blast doing this and so it was definitely worth the experience and portfolio piece. But maybe the next large print I do will be more my size. I think the next large ambitious print I will tackle will be 6 foot.

Thanks to Darrin, Jennessa, and Gina, my printing crew!! I couldn't have done it without you! And a special thanks to my beautiful wife Kayla for all her support and help!!

Thats all folks!

